Showing posts with label Other Than Cards. Show all posts

Wednesday, March 6, 2013

JustRite Friday Challenge #091: Color Challenge

This is my project for JustRite's Friday color challenge -- a gift basket and matching card for a birthday. I thought the colors of grey and yellow were perfect for just coming out of winter and entering spring.  In fact, we have some yellow poppies popping up in the desert already -- YAY!!!

I followed Becca Feeken's tutorial (found here) for the front of my basket and my card. I used one of my FAV JustRite clear polymer sets (Botanical Medallions & Banners) for my project, with the exception of my birthday tag, which uses Forever Friends cling. Dies used today are JustRite's Antique Labels One for card and tag and Spellbinders' Scalloped Edge Frame for the woven pieces and Classic Scalloped Circles Small for my decorative edges on the basket's flaps. I previously made this as an Easter basket and a gift basket (here and here) if you care to see them. Here is a close-up of the three ribbons that I braided to cover my basket's handle.

Saturday, October 13, 2012

My Sheri Crafts #096: Halloween

Our My Sheri Crafts' Challenge this week is: Halloween -- create anything your spooky little heart desires for this holiday! Several years ago I created a double-sided Halloween decor piece (here) that I was inspired to do by a piece of 6x6 Making Memories' paper. It was sooo fun that I've fashioned another using Spellbinders' Labels Twenty-three, Martha Stewart's latest Halloween mat stack and some Hobby Lobby bottle caps. For these decor pieces, the sky's the limit with the plethora of Halloween papers, dies and embellishments available.  It can be really unique and FUN -- make it 'sweet' for the younger ones or 'spooky' for the older crowd -- even personalize it, if you'd like!
I chose two different 'bird' papers to cut with my Grand Labels Twenty-three die from the MS stack and a piece of Tim Holtz grunge paper to sandwich inside, as I wanted to be sure the piece had the strength to hold up well when hanging and to support the bottle caps! I cut/embossed, sanded and distressed my paper with Black Soot ink and used a combination of Scor-Tape and Glue Dots to secure my 'sandwiched' pieces. Next I punched holes in the top/bottom and added 1/8" black eyelets, all with my beloved Crop-a-dile. From my stash I then attached different framed spooky mirrors @ center front & back. To build my double-sided 'boo', I first ran 3 bottle caps through my Grand Calibur using the cutting plate and adapter plate, which works like a 'charm' to flatten them! Again using my Crop-a-Dile, I easily punched 1/8" holes in the bottle caps. Circles die cut/emossed/sanded from the reverse side of one 'bird' scrap piece using Spellbinders' Standard Circles Large were then glue-dotted to the caps and glittered letters spelling 'boo' were added. "Eek" would work also! Tim Holtz jump rings were used to attach the bottle caps @ the bottom so they dangle/move and TH ball chain completes the hanger @ the top.

I hope you'll join us @ My Sheri Crafts this week by creating/posting your own Halloween concoction(s) to share with us!

Saturday, September 29, 2012

My Sheri Crafts Challenge #95: It's Picking Time!

Time for another My Sheri Crafts Challenge -- it's 'picking time', so we're asking you to include a pumpkin or apple on your project.  I took 'artistic license' and went with my 'pumpkin' in the form of a jack-o-lantern face on my burlap silverware (or plastic ware) holders -- Hee!!!

My first glimpse of the original idea for these with a gorgeous flower was here on Pinterest -- of course! Since I'd recently purchased a bunch of burlap in several colors (can you say 'new obsession'?), I just had to modify these to work for either a dinner table or an outdoor get-together with plastic ware, especially if you're doing something around Halloween for a child's or even adult's party. Thanks, sweet friend, for that clever idea -- add a little fun to a party and keep it simple when it comes to clean-up!
Then, inspiration struck as I was writing this post and it was back to the 'drawing board', as I had the idea for the apple -- great for back-to-school with any number of items tucked inside other than silverware -- pencils, pens, ruler, bookmark, large candy bar -- I'm sure many Moms, most children and certainly all teachers could think of dozens of ideas?!  Might be a cute/inexpensive idea for the upcoming fall/Christmas/winter holidays!!! NOW my head is spinning again and I don't even have any school-age children!!!

DIRECTIONS:
Cut burlap 14 1/2" long by 4" wide
Fold over 1 1/2" and zigzag stitch about 1/2" from raw edge (forgot
this on cream holder, but no big deal)
Fold bottom up 5 1/4" from last fold
Stamp with paint (I slipped bottom of holder under my craft mat at fold and stamped, then just wiped paint off mat where it bled through fabric -- easy/peasy!)
Once paint is dry, zigzag stitch up right side from bottom edge, in about 3/8 to 1/2", across top and down left side
Pull long threads from top/both sides for fringe 

NOTE: These are not washable, spot clean only, but burlap is sooo inexpensive and once you have the measurements, which I've included here, they are sooo quick/easy to whip up!

To create my orange/tan holder, I cut 1 piece from each color and layered tan atop orange and made per above directions. For my face, I merely cut pieces of craft foam for stamps and attached to acrylic block with 1/2" wide strips of Scor-Tape, squirted on a dollop of black craft paint, smoothed it out a bit with a sponge brush and stamped, beginning with the mouth, then nose & eyes for easy lining up -- simple/easy/non-perfectionistic!
Apple was stamped using . . . an apple, of course! Found a Pink Lady that had a tiny spoiled spot, so perfect for my needs!  Cut in half, spread my red paint with a sponge brush, stamped (had to do a little touch-up as my cut wasn't perfectly 'flat'), cut a Spellbinders's leaf from craft foam, and took the actual stem, held with a tweezers, dipped in brown paint, and added a bit of touch-up to the stem. If I can do it, you CAN TOO!
Hope you enjoy making these and hope you'll come up with an idea for a project for My Sheri Crafts to share with us too -- look forward to seeing your crafty pumpkin/apple idea -- hmmm, now another idea just hit me -- time to cut more burlap!!!  ;-)

Tuesday, May 15, 2012

JustRite Friday Challenge #072: 3D Project

My project for JustRite's 3D Challenge is a recycled plastic International Coffee container turned thank you gift holder. My sweet friend, Marilyn, saves these for me, as I only drink black coffee -- don't these just make the greatest little boxes?


I up-cycled some corrugated cardboard from my stash, peeling off one layer and brushing on Making Memories Manila scrapbook paint -- love the contrast/depth it adds! One cardboard piece was taped onto the body of the container and a top and bottom die cut with Spellbinders' Grand Labels Four.


To create a border around the bottom I first cut cream CS and lavender shimmer strips with Spellbinders' RicRac Edgeabilities die and then stamped a decorative JustRite stamp from With Sympathy beneath each point. Once my border was taped in place I attached a vertical strip to the back, then across the top to secure my lid. That strip is embellished with the same stamp and closes with a small magnet in front.


My circular Thank You sentiment from JustRite's Spring Words was stamped on a Labels Eighteen die and added to the lid, along with a rose created from Spellbinders' Spiral Blossoms One and Want2Scrap gem flourish that I colored lavender with Copic V17. Now it's all ready to fill with a little thank-you surprise.


Saturday, January 7, 2012

My Sheri Crafts Challenge 76: Time for a Change

Since it's a New Year, My Sheri Crafts says, "Time for a Change" (create any project that includes a clock). Hop on over to see the many ideas the DT is presenting! I altered a 49-cent composition book from Office Max to turn it into what I think is a lovely journal/notebook/recipe book/place to jot ideas -- whatever you wish-to-use-it for book!
Though the change is definitely dramatic, it was such an easy fix. I merely chose my papers (retired SU CS), cut it to roughly the height of my journal, adhered 1/4" Scor-Tape to the edges and and pressed my CS down, adding a separate piece of CS to finish off the back. Next I used a Basic Grey file to smooth the edges and Walnut Stain distress ink for antiquing -- really simple.
My 'midnight' clock is made using Spellbinders' Big Scalloped Circles, Tim Holtz Game Spinners, plus numerals for both the clock & year were cut with my new Boss Kut Gazelle -- a very simply project for a Gaz newbie!
That's it for my first 2012 project -- we'd LOVE to have you share your "Time for a Change" project with us @ My Sheri Crafts -- can't wait to see them all!!!

Saturday, October 15, 2011

My Sheri Crafts Challenge #71 - It's the Great Pumpkin!

At My Sheri Crafts the challenge is to create a project with a pumpkin on it -- Halloween related or not -- it's entirely up to you. How easy it that?! We'd LOVE to have you join us!
My glow-in-the-dark pumpkin decor piece was created using Spellbinders' Fleur de Lis Squares for the BG and featuring one of SB's Jack 'O Lantern dies as the focal point. I die cut the largest square from Kraft CS and distressed those lovely edges.
(Taken with a black light shining into Photo Tent)
The next smaller square was cut from black CS and then for the fun part, I used 1/2" glow-in-the-dark tape to cut just the fancy edges again. Then it was simple to just tape them to my black square. Sadly, I used the last of this tape that I've had for many years, but I'll definitely be looking for more and in a wider format. I'd LOVE it in sheets too, as it cut so easily with these dies! I also used it for my Jack 'O Lantern's eyes/mouth, as you can see in these next two photos.  
My hubby is a much better photographer than I, so he helped me capture the "glow"!  ;~)  I also have some glow-in-the-dark embossing powder (also really old) that I'm going to try to see if it will still glow. A little eerie/spooky Halloween FUN added to a project!!!
(Taken in total darkness)


Products Used:
CS/DP: Papertrey Ink: Kraft CS (BG, stem, nose), Ripe Avacado; Bazzill Black; Making Memories' Spook Alley (orange DP for Jack)
Ink: Tim Holtz Distress: Antique Linen
Dies: Spellbinders: Fleur de Lis Squares and Jack 'O Lanterns
Miscellaneous: Glow-in-the-Dark Tape and 1/4" black ribbon from my stash

Sunday, June 19, 2011

My Sheri Crafts Challenge #62: Beach/Summer Theme


This week's challenge at My Sheri Crafts perfectly fits a project I just completed using Tattered Angels Seaside Beachcomber Embossed Glimmer Chips/Tiles, various Tattered Angels Glimmer Mists and Tim Holtz Distress Inks.
This brings back memories of visiting the CA beaches when our kids were little, since we lived within 30 minutes of the ocean. Although I was never a big fan of actually being in the water or the hot clingy sand everywhere, the ocean itself is such a gorgeous powerful force rolling onto shore. I think I'm much better suited to dry land and now living in the SW desert, I definitely get to experience that -- LOL!
This project was something definitely out of my comfort zone, but it was fun to experiment with the mists and play with the tile and especially the fish/seashell chips, all while taking a little walk down memory lane!


Products used:
Tattered Angels Seaside Beachcomber Embossed Glimmer Chips
Tattered Angels Glimmer Mists (various colors)
QuicKutz/Lifestyle Crafts 2011 Spring Gift Set RV (Alpha letters)

Tim Holtz Distress Inks (Antique Linen/Wild Honey)

Saturday, February 5, 2011

Happy Birthday, GF

Amidst all the goings-on at my house lately, I managed to hurt my back, so I'm not quite functioning as I'd hoped. Thanks to a dear friend's reminder, I did manage to get a project finished in time to celebrate another GF's birthday yesterday with the two of them! Many months ago I had made the four woven ribbon panels for this basket with the Birthday Girl in mind, as blue is her favorite color. I took the simple route and finished it with glittered handmade paper from my stash, using Spellbinders' Lacey Circles and a silver pearl. I then created a simple square matching card with Lacey Circles, Lacey Squares and a birthday greeting from JustRite's Baroque Nested Frames from the supplies I had out on my work space. Full directions/details for the basket panels, box and woven handle can be found on Becca Feekens' blog here. I also previously made this Easter basket for a little girl. Hope everyone is managing to stay warm and safe wherever you are!

Saturday, August 14, 2010

JustRite Friday Challenge 031: Back to School and My Sheri Crafts Challenge #17


I recently came across this idea on SCS where they used salt/pepper shakers from the $1 store to make pretty, but inexpensive decorative gifts. I decorated mine to celebrate "life long learning" using my JRS Just a Note Borders & Centers and 15-pt. TNR stamp sets. Blue Bazzill Bling paper, Encore Ultimate Metallic Blue Ink embossed with clear EP, Spellbinders' Stars dies and lots of sparkly stars and silver/glittery ribbon swirls finish off my gift and matching card.
Edited to Add: I always link to challenges to make it easy for you & I forgot to do that. They are: My Sheri Crafts and JustRite Inspiration, so now you can go check both of them out!!!

Monday, March 15, 2010

Woven Ribbon Easter Basket


I know it's been a long while since I posted, but here's what I've been up to: doing my best Becca Feeken impersonation -- LOL -- AS IF anyone could top her amazingly incredible creativity! I'm linking you to the directions for her breathtakingly gorgeous Valentine Basket, which I've made for a friend's 4-yr.-old. I sincerely thank Becca for her unending inspiration and willingness to share not only her gorgeous creations, but also detailed videos, drawings and photos of just how to re-create her gems. You'll be blown away when you visit her blog, if you've not yet had that pleasure! She truly tops my list of fav blogs I check daily.
Paper: PTI's Vintage Cream; Bazzill Bling
Stamps: Little Paper Shop's {All Occasion}

Ink: PTI's Raspberry Fizz
Tools: Spellbinders' Wizard & Scalloped Edge Frame, Nested Eggs, Easter Fun, Scalloped Cirlces Dies; MS Garden Trellis Punch
Embellishments: Michaels' Dashes, Dots & Checks Ribbon; green ribbon from stash; DCWV chipboard

Saturday, December 19, 2009

Spellbinders' Labels 5/K & Company Happy Birthday Gwen


Imitation being the sincerest form of flattery, I had to imitate Claire's adorable box creation for my sweet friend Gwen's birthday! Claire is such a creative genius that I had to carry her idea onto my card. She also has a fabulous Stamp Company, Waltzingmouse Stamps, so be sure to check it out -- you won't be disappointed!!! Her incredible samples are throughout her blog too!
I knew Gwen liked these DPs by K & Company, so felt I couldn't go wrong there. I love how both turned out! Best part of all was that both Gwen & my other BFF Ilene had time to "do lunch" yesterday and I got to tag along with Ilene & surprise Gwen! She picked a fabulous little restaurant in downtown Chandler (AZ) for lunch. We all had the same fabulous salad, 2 hours of chatter & laughter & a gorgeous sunny day in the mid-70's -- what more could BFFs ask for?!
Paper: K & Company's McKenna & Margo; SU CS
Stamps: PTI's Everyday Classics, Friends 'Til the End & Vintage Labels
Ink: Tsukineko's VersaColor: Rose Red
Embellishments: Hero Arts Gemstones
Tools: Spellbinders' Wizard Die Cutter & Labels 5 Dies

Thursday, February 5, 2009

PTI's It's in the Bag Challenge

Nichole Heady posted a challenge here today to create, decorate or alter a bag for a fabulous prize including a one-0f-a-kind PTI canvas bag containing a fabulous $100 gift card to Papertry Ink! Talk about exciting!!! Even after no sleep for 3 nights, a trip to the doctor & sinus infection meds, I managed to toss together a decorated bag for the challenge. I was anxious to use both this gorgeous new wired ribbon I received as a gift from our out-of-town guests and the PTI Sweet Love stamp set I recently purchased.
I removed the cord handles from the bag and replaced them with the ribbon. I attached ribbon under the inside flap to hide the end, ran it down the front, across the bottom & up the back and secured under the flap again.
I stamped the solid oval swirl design & Happy Valentine's Day in Pure Poppy on Shimmer cardstock (I love it!), die cut/embossed with my oval Nesties and added two pearls. After attaching it to the center front, I added a pearl heart stick pin through a felt heart from Hobby Lobby above it. Very quick & simple, but I love how the stamped oval and fun heart ribbon dressed up a once plain red bag!!! I'm planning a card to compliment my bag, but I've "run out of gas" tonight, so that will be a project in a day or two!
Paper: PTI's Shimmer cardstock
Stamps: PTI's Sweet Love
Ink: PTI's Pure Poppy
Embellishments: Making Memories Stick Pin, wire-edged ribbon from Costco; felt heart from Hobby Lobby; pearls from stash

Saturday, January 31, 2009

SBS22 January Blog Hop Challenge by Peggy


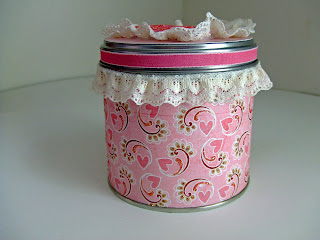
My SBS22 Sister Peggy's January challenge (here) was to create anything but a card - the only catch is that it must be for Valentine’s Day! So I decorated a Tully's coffee tin from a Christmas pack I bought at our local supermarket. I'll probably fill it with Hershey's Nuggets for the recipient - a little chocolate is always a great treat!!! Don't forget my SBS22 challenge to create a card using no pink or red & one Valentine! ;-)
Paper: Basic Grey's Bittersweet
Ink: PTI's Palette Raspberry Fizz
Ribbon: Making Memories
Other Embellishments: Spellbinder's Wizard Scalloped Heart; Fruit Punch Stickles; Lace & Felt Heart from stash

Thursday, October 30, 2008

Halloween Crafting 2008


I made some Halloween decorations for my kids to use in their respective homes this holiday. The door hanger was for my DD's roommate (couldn't leave her out) and the witchy went to them for their apartment also. I made the cat for my son's GF for her apartment (because she has a cat) & the skeleton for my son. He said he and his roommates had the perfect spot for it & they were just decorating their house when it came. It's made of metal and I found it marked down to $1.49 @ Michaels -- couldn't believe the price! I would normally have made him something too, but knew this was perfect for him! Of course they each received a card from me also, among the many that I'd previously made and posted here! Beware of all the spooks & ghouls out there & have a Happy Halloween everyone!!! ;-)
Papers and Paints: Making Memories
Rubons: K & Company
Ribbons: Martha Stewart

Wednesday, October 22, 2008

Spooky Halloween Decoration

I found all the Halloween stuff on sale @ Michael's yesterday, so decided this would be for ME! LOL!!! I got other fun stuff to make & send my kids and I'll post those once I know they've received them, so as to not spoil their surprise!
It was so fun/easy to cover this with various scraps from my stash! I discovered I like using Elmer's Rubber Cement, because if I make a mess, it just rubs off, whereas with Mod Podge I always have a splotch I can't remove on the front of my project! I'll be stocking up on Rubber Cement next trip! Wish I'd have found more than one of these, but sadly this was the last @ the particular Michael's where I shopped! Maybe I'll be lucky & find more before they're gone at another store(?)!!!
Paper: Making Memories, Pebbles, Inc. & K & Company Halloween papers
Ribbon: Martha Stewart
Embellishments: Making Memories brad & sticker

Monday, October 20, 2008

Rest Your Bones

I promised my DD that I'd send her something I made for
Halloween, so this is the little creation I came up with. I based it on the dotted paper that had this shaped design on it from 2007's Making Memories 6" x 6" paper pad. I simply glued it to a piece of cardboard & then added K & Company glitter stickers and MM's Glitter Pebble Sticker on one side. For the other side, I used MM's Spellbound Die-cut Pumpkin paper and my embossing pen & glow-in-the-dark embossing powder inside the pumpkins' faces so they'll glow in the dark. I then used Halloween embossing powder on the chipboard letters, hung them from the bottom point & added a ring and orange chain for hanging.
Papers: Making Memories Halloween Papers (2007 & 2008)
Embellishments: K & Company Glitter Stickers; Making Memories Glitter Pebble Stickers; Chipboard letters; glitter & glow-in-the-dark embossing powders

Sunday, October 19, 2008

Halloween Treat Basket


My friend, Ilene, was visiting today & working on a Christmas Treat Basket, so I decided to do a Halloween basket. Last year I made 2 for Christmas gifts and they can found under my Treat Holders label on the right. Again, the directions for making this treat holder can be found here on Splitcoaststampers awesome site! I liked both sides of this cardstock, so decided to keep it very simple and not add any patterned paper squares. I used a metal ring (actually a very large hoop earring I got for this very purpose at the $1 store last year) and added some chipboard buttons from last year and tied various Halloween ribbons around the ring! Pretty simple & it's ready for trick or treaters. Now I'll have to go hide the candy again or my DH will eat it all long before the 31st!!! Bet parents are glad it's a Friday night this year!
Paper: Making Memories Brocade Orange Spellbound Cardstock
Embellishments: Making Memories Chipboard Buttons (2007); Martha Stewart Ribbons (2007); black eyelets; silver hoop earring
Tools: Crop-a-dile II; Scor-It

Wednesday, October 8, 2008

Hey Turkey!!!

Once again, this darling idea (like my previous post) came from Vicki Hook here! She said: " Go ahead, try it! You know you want to!" She was right -- so I did!!! And I'm so glad I did; with the Nesties, he didn't really take very long to make either! Vicki's site is full of awesome ideas, so I've got to go back & look around some more!!!
He's so cute I've not decided whether to put him on a card or perhaps just make him a decor item for Thanksgiving. Wouldn't these be adorable as placeholders for your holiday dinner?! You could put the person's name on the front of him cut out with a scalloped rectangle - too cute!!! You could even use smaller Nesties for those; I used my largest.
Paper: Basic Grey's Mellow 6 x 6 Paper Pad; Making Memories' 6 x 6 Travel Paper Pad
Embellies: Wiggly Eyes from stash

Sunday, August 17, 2008

Mini Scrapbook Purse in Black & White

I thought my Mother-in-law would enjoy this little birthday purse. I'm just sad I didn't have enough of her fabric to include any of the flowers used in her card (see my previous post). This is the pattern I've previously used from Susan Mast, whose link is here. I'm planning to make another purse yet this week & Susan kindly helped me find the paper for it!
Paper: Luxe Designs Chick Flick Cardstock; Swiss Dots from stash
Embellishments: Blue Moon Beads; Petaloo Silk Flowers; brads, ribbons, button, vellum saying, chipboard from stash
Tool: Crop-a-dile II


Wednesday, July 30, 2008

Birds of a Feather Bookmark

Grabbed a scrap piece of cardstock and made a quick bookmark for a friend who reads a lot. I so LOVE the Palette Berry Sorbet ink by Papertry Ink that I find myself wanting to use it all the time. It's just such a luscious, unique color!!! I'm also very fond of the hummingbirds we have year-round here, so I'm really enjoying their Birds of a Feather stamp set also.
Paper: Scrap from stash
Stamps: Papertrey Ink's Birds of a Feather set
Ink: PTI's Berry Sorbet, Spring Moss & Summer Sunrise Palette Inks
Ribbon: Martha Stewart from Michaels

LinkWithin

Blog Widget by LinkWithin