Sunday, July 28, 2013

Summer Card Camp 2: Week 3, Day 2

Do you ever make a card that just refuses to turn out even remotely like you envisioned and you have to end up making nearly each/every little part of it over. . .& over. . .& over -- until you're determined to finish & post it, regardless?!  Maybe it's just a personality disorder -- LOL?!

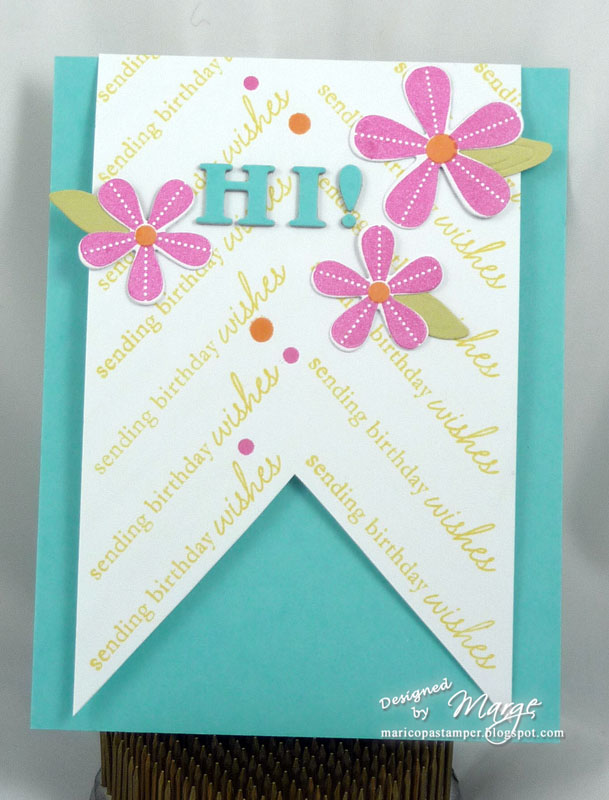
It was all 'operator error' along the way -- the cards @ SCC2 were FABULOUS, as were the videos/directions/explanations. My biggest problem,I think, was that I tried so many different things with the flowers that in the end even though NOT the colors I'd hoped for, I still kinda liked them and had spent sooo long on them that I just felt I had to roll with it. Of course, the colors don't even look the same in my photo since they're shiny/embossed, but I still like them.

One FABULOUS idea from camp was the embossed clear acetate, but that gave me fits too -- kept seeing scratches or I'd get a bit of adhesive on it and that annoyed me -- sigh! Oh well, I still had a fabulous play with layering different embossing powders on my die cut flowers/stems and practice working with acetate and LOVE the verse I found that I'd forgotten I had, so in the end it's all good!

Supplies:
Paper: PTI's White CS; blue CS from stash
Stamp: PTI's Year of Flowers Collection
Ink: Versamark Dazzle (to add a bit more glitz to my sentiment/stems)
Dies: Lifestyle Crafts Ovals

Miscellaneous: Personal Stamp Exchange's Woven Tapestry EP, Stamp 'n Stuff Lilac EP; Martha Stewart's Clear EP; various markers (on flowers); Grafix Dura-Lar acetate film


Wednesday, July 24, 2013

JustRite Friday Challenge #101: Christmas in July

My preferred type of card to create is classy/elegant and I'm sooo thrilled that this Christmas card definitely fits my standards! The challenge over at JustRite that ends today thankfully asks us to create for Christmas and I NEED many more cards for the holiday, so at least now one more is finished -- YAY!!!

Using my beloved Radiant Rectangles, I embossed 2 layers in white and aqua to layer onto my white card, rounding all corners to compliment those on the Radiant Rectangles. I stamped/embossed/die cut my ornament from a favorite JR Christmas clear stamp set, also die cutting the center opening with a custom JR Antique Labels One die, also a big FAV. Noel is stamped/embossed and sits below the ornament, which I adhered with foam adhesive for depth. LOVE the dimension this and the embossed rectangles create along with my embossing powder. Sadly my camera (or just the operator) couldn't pick up the gold flecks in my EP or how totally sparkly all those gems are in real life -- sigh!

Edited to Enter @ Moxie Fab World's challenge: http://www.moxiefabworld.com/2013/08/holiday-cards-more-week-holiday-card.htmlhttp://www.moxiefabworld.com/2013/08/holiday-cards-more-week-holiday-card.html

Supplies:
Paper: PTI's White CS; Ice Silver Metallic & Aqua Metallic from stash
Stamps: JustRite's Noel Christmas Ornaments
Inks: VersaMark
Dies: JustRite Custom Antique Labels One; Spellbinders' Radiant Rectangles; Heirloom Ornaments 2010
Other: WeRMemoryKeepers Corner Rounder; Little Yellow Bicycle's Jewel Stickers (on bow); Crystazzi Flatback gems (Michaels); BMuse Pale Turquoise Metallic EP; white ribbon from stash

Monday, July 22, 2013

Summer Card Camp 2: Week 3, Day 1

Struggled a bit finding a good white ink for my stamped BG and with the purples in today's color combo, but what a FUN sketch -- LOVE the fabulous banner. In the end I feel this makes a great card, even quite appropriate for a male, which is why these geometric BGs appeal to me so much! Always love another male card idea and can't wait to try more with different shapes.

Supplies:
Papers: PTI's Kraft; Bazzill White & Blue CS
Stamps: JustRite's Pattern Basics
Inks: VersaFine Vintage Sepia; Colorbox Eggshell White
Dies: QuicKutz/Lifestyle Crafts Spring 2011 Gift Set (Alphas)
Embellishments: Buttons & brown jute from stash

Saturday, July 20, 2013

Summer Card Camp 2: Week 2, Day 5

I was so taken with Jessica Witty's Layered Vellum card (and actually had two stamp sets used) that I just HAD to make my own. Once again, I pretty much CASEd her card, except I used a different color combo, mine being #4 of the 6 we were given on Friday.  Had a bit of trouble with ALL the hot pinks/raspberry ink shades I own on my vellum, both dye and pigment inks  -- NOT sure why? They only wanted to pool up/look splotchy on my flowers -- even after cleaning them extra well AND rubbing over them with a white eraser?! In the end, I used different flowers from the same set which where were a bit better.
Jessica's card layers begin with white CS. Stamp your first flowers near the center bottom in your neutral color, so that they basically look like a shadow in the BG. Mine is Memento's London Fog. Next, stamp a vellum piece the same size as your white base with grass/blooms a bit off the left edge. Finally, another vellum piece with stems/blooms at the right side and your sentiment near the top. My sentiment should have been about a half-inch or so lower, but I still think it's a sweet little card. I colored white crochet thread sporadically with a Cool Gray (C-5) Copic and wrapped it just at the edge of my vellum.

Wish I was a great photographer to truly do this card justice -- SIGH! I plan to create this card again in different colors as a sympathy card because I think it has such a peaceful, serene tone -- LOVE it!!!

Supplies:
Paper: Grey Bazzill CS; vellum
Stamps: PTI (Botanical Silhouettes); Technique Tuesday (Growing Wild & Long-Stemmed Sentiments)
Inks: Memento's London Fog & Pear Tart; PTI's Raspberry Fizz; VersaColor's Marigold

My Sheri Crafts Challenge 115: Let's Take a Trip!

For the MSC challenge this go-round, we're asking you to create a project that has something to do with traveling. It can be a mode of travel, a destination, reason to travel, etc. In my case, I'm just dreaming of a Paris vacation, because I was looking for something I'd misplaced in my craft room yesterday and ran across this 'ancient' tag -- LOL! Okay, it's not quite that old, but I did seriously make this in a class MANY years ago.

I always LOVED it and never wanted to part with it, but decided yesterday it would be awesome with the Eiffel Tower in the BG. It also gave me a chance to play with my new find: Inka Gold Metallic Rub. The very day Becca Feeken used it on her Spellbinders' Release projects, I went into Hobby Lobby and my dear friend there showed me some new items, including the Inka metallic rub. I just bought gold, but think now I'll need the silver too! I backed my card with black CS, rubbed some metallic rub along the edges and buffed with a soft rag. I added a bit on two corners of my tag also. Next I stamped just the word dream from a JustRite retired sentiment stamp on black CS, embossed in gold EP and cut with JustRite's Antique Labels One die. Of course, I'm only 'dreaming' of ever actually seeing Paris, but life would be dull without  dreams -- and paper crafting!

Looking forward to seeing what your dreams (or reality) for travel might be!!!

Sunday, July 14, 2013

Summer Card Camp 2: Week 1, Day 1


(Updated version!)
Following Jennifer's colors and her sketch
quite literally for a flap-style card (wherein the recipient's greeting will go underneath the flap) and building a dimensional die cut, this is my first 'homework' for class -- life got crazy again! I love the 'chevron'-style BG stamping she taught us in her video -- really FUN and quite easy to achieve with her tips/tricks.
EDITED to add: New updated photo of same card, but I added orange gems (colored with a Copic marker) and ribbon -- after looking at this card for a couple days and battling allergy symptoms ever since Card Camp began, I felt this needed a 'punch', so here's my changes. Sure I'm not the only one who likes her cards better after a change or two?!

(Original version)


SUPPLIES: 
Paper: PTI's Aqua Mist & Spring Moss; white CS from stash
Stamps: PTI's Beautiful Blooms II and Everyday Button Bits (sentiment)
Ink: Memento Rose Bud, Tangelo & Dandelion
Dies: QuicKutz/Lifestyle Crafts Spring 2011 Gift Set (Alpha Letters)

Tuesday, July 9, 2013

JustRite Friday Challenge #100: Delicate Doilies

I seem to be on a 'yellow' binge with my creativity lately, so I just went with it for JustRite's 100th Challenge -- WOW -- I first took part in Challenge #005 in February 2010 and have rarely missed any since. It's been really fun and hope it continues for a long time!

I decided to make a large half-fold card (8 1/2" x 5 1/2") for this challenge in order to use the entire large oval doily from my stash. Beginning with a white card, I die cut the bottom edge as well as my layer of yellow dot paper with Spellbinders' A2 Bracket Borders One. After attaching my doily, I stamped a border from Celebration Labels One & Bracket Borders One in Moonlight White Brilliance Ink to finish off the bottom detail.

Next, I inked Spellbinders' Floral Oval Die #3 with white ink and embossed it into a black oval -- I LOVE the 'blackboard' look this gave my focal image and border. Lace Medallion Labels stamped in Moonlight White on black CS is where my tiny 'lacy' butterfly originated. He's finished off with wire antennae and three tiny pearls. For my sentiment I combined Grand Sentiments and Celebration Labels stamps on a yellow oval die cut with Memento Tuxedo Black ink and accented both ovals and doily with pearls.

Using Spellbinders' Bitty Blossoms, I cut a white coffee filter and spritzed with Tattered Angels Sunshine Glimmer Mist -- just love the soft color and shimmer (which sadly never shows in photos). My flower and simple seam binding bow finish off my entry for JustRite's monumental 100th Challenge.

Sunday, July 7, 2013

Summer Card Camp 2: Pre-Class Challenge 2

For our 2nd Pre-Class Challenge for Summer Card Camp, we were given a sketch -- really had fun working on this as my fav style is classy & elegant, which I think this is!

Working with Papertrey Ink's Mehndi Medallion stamp set, I first began with Spellbinders' Radiant Rectangles, which I inked with Memento's Dandelion ink prior to embossing. Once my 'frame' was done I stamped the three medallions in Memento's Rich Cocoa, Dandelion and Pear Tart ink.

Next, I cut my sentiment banner with Spellbinders' Nested Pennants, inked the edge and stamped my sentiment from Papertrey Ink's Iconic Images in Rich Cocoa, then added a small medallion from each stamp set. Finishing it off, I adhered my Vintage Cream CS piece to a Dark Chocolate card and colored clear gems with Copic Markers and a brown Sharpie to add to each medallion.

So excited to see what fun we'll have when our actual classes begin tomorrow -- thanks for coming by for a peek!

Saturday, July 6, 2013

Summer Card Camp 2: Pre-Class Challenge 1

I'm sooo excited to have won a spot yesterday in Summer Card Camp 2 from Nichole Heady, Papertrey Ink co-owner and a Guest Designer @ camp, as are several of her Design Team members -- Woo-Hoo!!! This is my first-ever online class, which I think will be perfect, as I seem to create best when alone in my craft room @ home!

The 'official' online class begins on Monday, but we were given two Pre-Class Challenges to play with while we wait -- the first being a color challenge:

(printed piece & vellum copy)
While going through my many paper pads for inspiration, once I saw this paper I felt it would be perfect for Summer Card Camp, but I needed to use at least 4 of those five colors (shown above). I decided to paper piece just some of the surfboards in coordinating colors. First, I placed the paper onto my printer's glass and copied onto a piece of vellum to make exact patterns.Next, I cut out three of the boards from designer paper and pop dotted them on, which gave more texture.

Next, I cut out three of the boards from polka-dot designer paper and glued them on, which gave more texture/depth. Using a sentiment from the same paper pad, I backed it with more aqua CS, rounded the corners and then added aqua and grey layers before attaching them all to my white card. I know the perfect person to send this simple little card to now that it's done -- a total bonus!  ;~)

Paper:  PTI White, Smokey Shadow & Aqua Mist CS; Echo Park Dots & Stripes 6x6 pad; WRMK Down the Boardwalk 4x6 pad
Tools:  WRMK Corner Chomper (LOVE it!)

As I went to list my supplies, I realized I'd made an entire card with no stamping or dies -- a rarity, but I'm sure that will not be the case for long -- LOL! I think it's good to try lots of different ideas/color combos/sketches and to do no stamping sometimes, just a little paper piecing and letting the fun papers speak for themselves?!

If you're looking for a little 'summer fun' (even though you may not be at a lovely beach -- I'm certainly NOT!), there's still time to join in the fun @ Summer Card Camp 2 -- hope to see you there! Sooo thrilled to learn that my sweet friend, Mary Jo, will be playing along and can't wait to see what she creates along the way!!!

My Sheri Crafts Challenge #114: What's the BUZZ!


A fun challenge this next 2 weeks @ My Sheri Crafts where we're asking you to create a summer-themed project using black, white and yellow!

My project is simple, but I really like the end product, which is so easy when combining JustRite stamps and Spellbinders' dies. I chose Spellbinders' Radiant Rectangles to cut my black frame to surround the gorgeous rose stamp from JustRite's With Sympathy clear set. I stamped in Memento's Tuxedo Black ink and colored it with Copic markers. The sentiment is from JustRite's Ever After Antique Labels One, also stamped in Tuxedo Black -- I just love the elegant font.

A soft cotton ribbon from France in yellow from my favorite local ribbon store finishes off this simple card. We're looking forward to seeing your black/white/yellow project posted for this challenge @ My Sheri Crafts.

LinkWithin

Blog Widget by LinkWithin